# 集成 Devtool 到 IOS
TIP
iOS Devtools for Apache Weex (opens new window) 是三方插件, 不由 Apache Weex 开发或维护。
iOS Devtools for Apache Weex 能够方便调试 Weex 页面,但此功能离不开 Native 的支持。本章将会详细说明 iOS 端如何接入 iOS Devtools for Apache Weex。
- iOS 应用接入DevTool
- 和Debug Server 配合使用
# 版本兼容
| WeexSDK | WXDevtool |
|---|---|
| 0.16.0+ | 0.15.3 |
| 0.17.0+ | 0.16.0 |
| 0.18.0+ | 0.16.3+ |
| 0.19.0+ | 0.17.2+ |
| 0.20.0+ | 0.20.0+ |
| 0.24.0+ | 0.24.0 |
# iOS接入指南
# 添加依赖
建议在DEBUG模式下依赖
# 方法1: cocoapods 依赖
在工程目录的 podfile 添加如下代码
source https://github.com/CocoaPods/Specs.git,
pod  'WXDevtool', '0.20.0', :configurations => ['Debug'],
2
可以通过更新本地 podspec repo,pod search 来查询最新版本,在 podfile 文件添加依赖。
# 方法二:github 源码依赖
1、git clone git@github.com:weexteam/weex-devtool-iOS.git
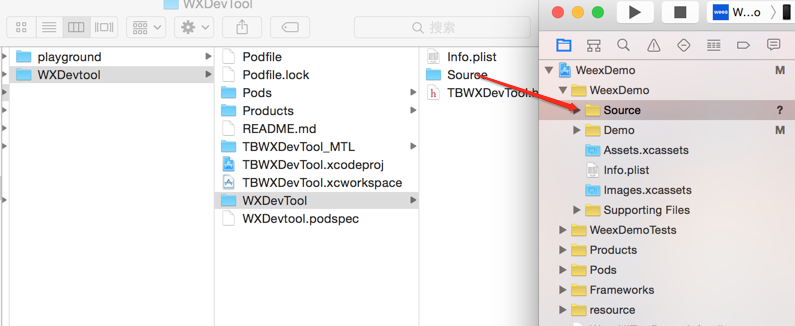
2、如下图示:拖动source目录源文件到目标工程中

3、按照红框中配置勾选

在相对较大的互联网 App 研发中, framework 静态库被广泛应用,所以推荐使用方法一接入。
# 集成功能
参考 PlayGround 中的实现
//方法1 pod依赖方式
#import <TBWXDevtool/WXDevtool.h>

//方法2 源码依赖方式
#import "WXDevtool.h"
2
3
4
5
查看 WXDevtool 头文件如下:
@interface WXDevTool : NSObject

+ (void)setDebug:(BOOL)isDebug;

+ (BOOL)isDebug;

+ (void)launchDevToolDebugWithUrl:(NSString *)url;

@end
2
3
4
5
6
7
8
9
setDebug:参数为 YES 时,直接开启调试模式,反之关闭,使用场景如下所述。
# 扫码调试
如果你的应用中存在扫码功能或即将集成扫码功能,推荐使用该方式进行集成,Demo 地址见: Playground App (opens new window)
核心代码为获取扫码链接中的 _wx_devtool 参数,并将调试工具与调试服务器链接:
[WXDevTool launchDevToolDebugWithUrl:@"ws://{ip}:{port}/debugProxy/native/{channelid}"];
# 直接链接
如果你需要直接让你的应用链接上Weex调试工具,你需要通过如下方式进行集成:
1.命令行运行 weex debug --port 8888 --channelid 1 去指定端口号及调试进程ID.
2.添加如下代码到你的应用中,注意替换对应的{ip},{port},{channelid}为你本地的值。
[WXDevTool setDebug:NO];
[WXDevTool launchDevToolDebugWithUrl:@"ws://{ip}:{port}/debugProxy/native/{channelid}"];
2
如果程序一启动就开启 Weex 调试,需要在 WeexSDK 引擎初始化之前添加代码,同时需要将Debug开关设置为 NO,进入调试界面后再打开 JS Debug 开关(服务链接时对于纯weex项目会丢失首屏Weex页面的消息导致白屏)。
# 附加页面刷新功能
什么场景下需要添加页面刷新功能?
- 切换 JSDebug 开关时刷新页面
- 刷新 Chrome 页面(command+R)
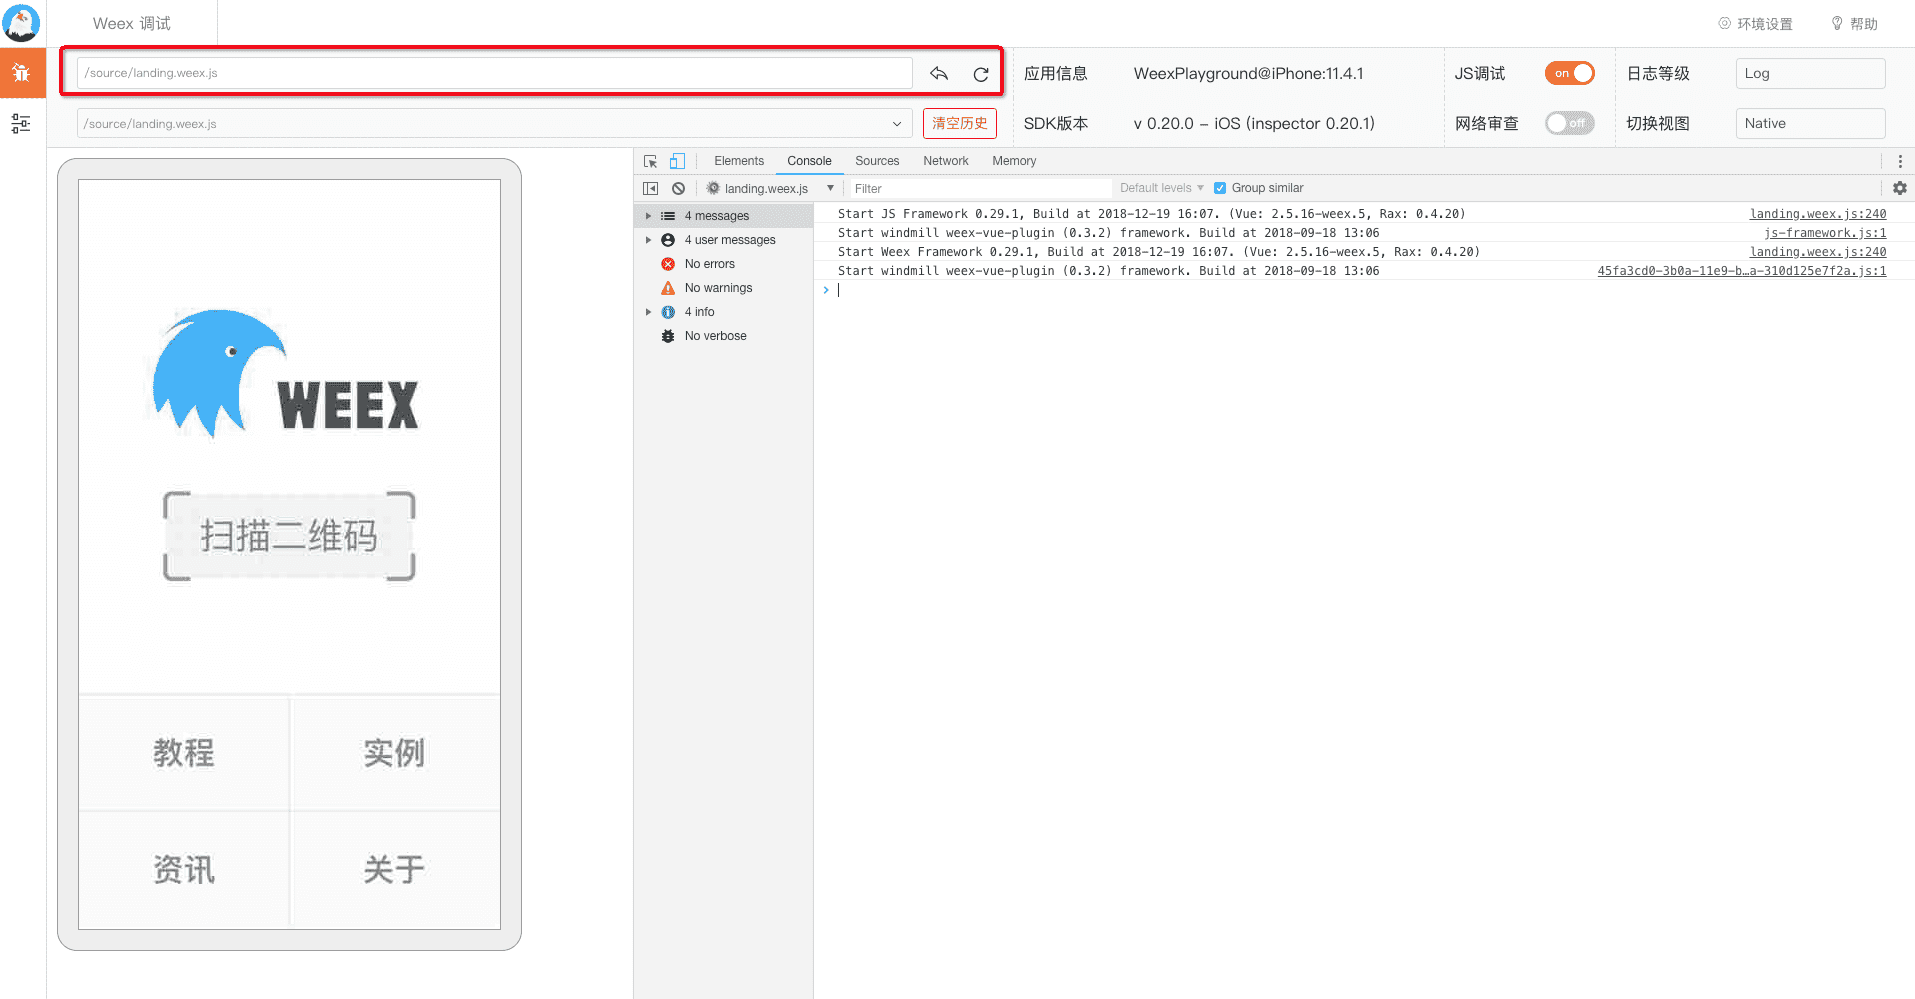
如下图所示,在快速导航功能中需要能够刷新当前weex实例,同时,在切换JSDebug按钮状态时也需要将运行环境会从手机端(JavaScriptCore)切换到 Chrome(V8),这时需要重新初始化 Weex 环境,重新渲染页面。页面渲染是需要接入方在自己的页面添加。

如何添加刷新
- 具体实现可参考 Playground (opens new window)
AppWXDemoViewController.m例子
在 Weex 页面初始化或
viewDidLoad方法时添加注册通知,举例如下:[[NSNotificationCenter defaultCenter] addObserver:self selector:notificationRefreshInstance: name:@"RefreshInstance" object:nil];1最后千万记得在
dealloc方法中取消通知,如下所示- (void)dealloc { [[NSNotificationCenter defaultCenter] removeObserver:self]; }1
2
3
4页面刷新实现,先销毁当前 instance,然后重新创建 instance,举例如下:
- (void)render
 {
	CGFloat width = self.view.frame.size.width;
	[_instance destroyInstance];
	_instance = [[WXSDKInstance alloc] init];
	_instance.viewController = self;
	_instance.frame = CGRectMake(self.view.frame.size.width-width, 0, width, _weexHeight);

	__weak typeof(self) weakSelf = self;
	_instance.onCreate = ^(UIView *view) {
		[weakSelf.weexView removeFromSuperview];
		weakSelf.weexView = view;
		[weakSelf.view addSubview:weakSelf.weexView];
		UIAccessibilityPostNotification(UIAccessibilityScreenChangedNotification,  weakSelf.weexView);
	};
	_instance.onFailed = ^(NSError *error) {

	};
	_instance.renderFinish = ^(UIView *view) {
		[weakSelf updateInstanceState:WeexInstanceAppear];
	};

	_instance.updateFinish = ^(UIView *view) {
	};
	if (!self.url) {
		return;
	}
	NSURL *URL = [self testURL: [self.url absoluteString]];
	NSString *randomURL = [NSString stringWithFormat:@"%@?random=%d",URL.absoluteString,arc4random()];
	[_instance renderWithURL:[NSURL URLWithString:randomURL] options:@{@"bundleUrl":URL.absoluteString} data:nil];
}
1
2
3
4
5
6
7
8
9
10
11
12
13
14
15
16
17
18
19
20
21
22
23
24
25
26
27
28
29
30
31- 具体实现可参考 Playground (opens new window)
说明:目前版本需要注册的通知名称为固定的 “RefreshInstance”,下个版本会添加用户自定义 name 。
